This section explains the process of setting up and configuring the
XVF3800 firmware on an XK-VOICE-SQ66 development kit.
Version v3.1.0 of the XVF3800 firmware supports audio I/O via I2S or USB UAC2.
The instructions below describe how to set up an evaluation system in either configuration.
Note
The XK-VOICE-SQ66 development kit is intended for use as an evaluation board for the XVF3800 and after power on or reset the device will stop processing audio after 8 hours of continuous use.
The board must be restarted after 8 hours to resume operation. Licensed production XVF3800 devices do not have this restriction.
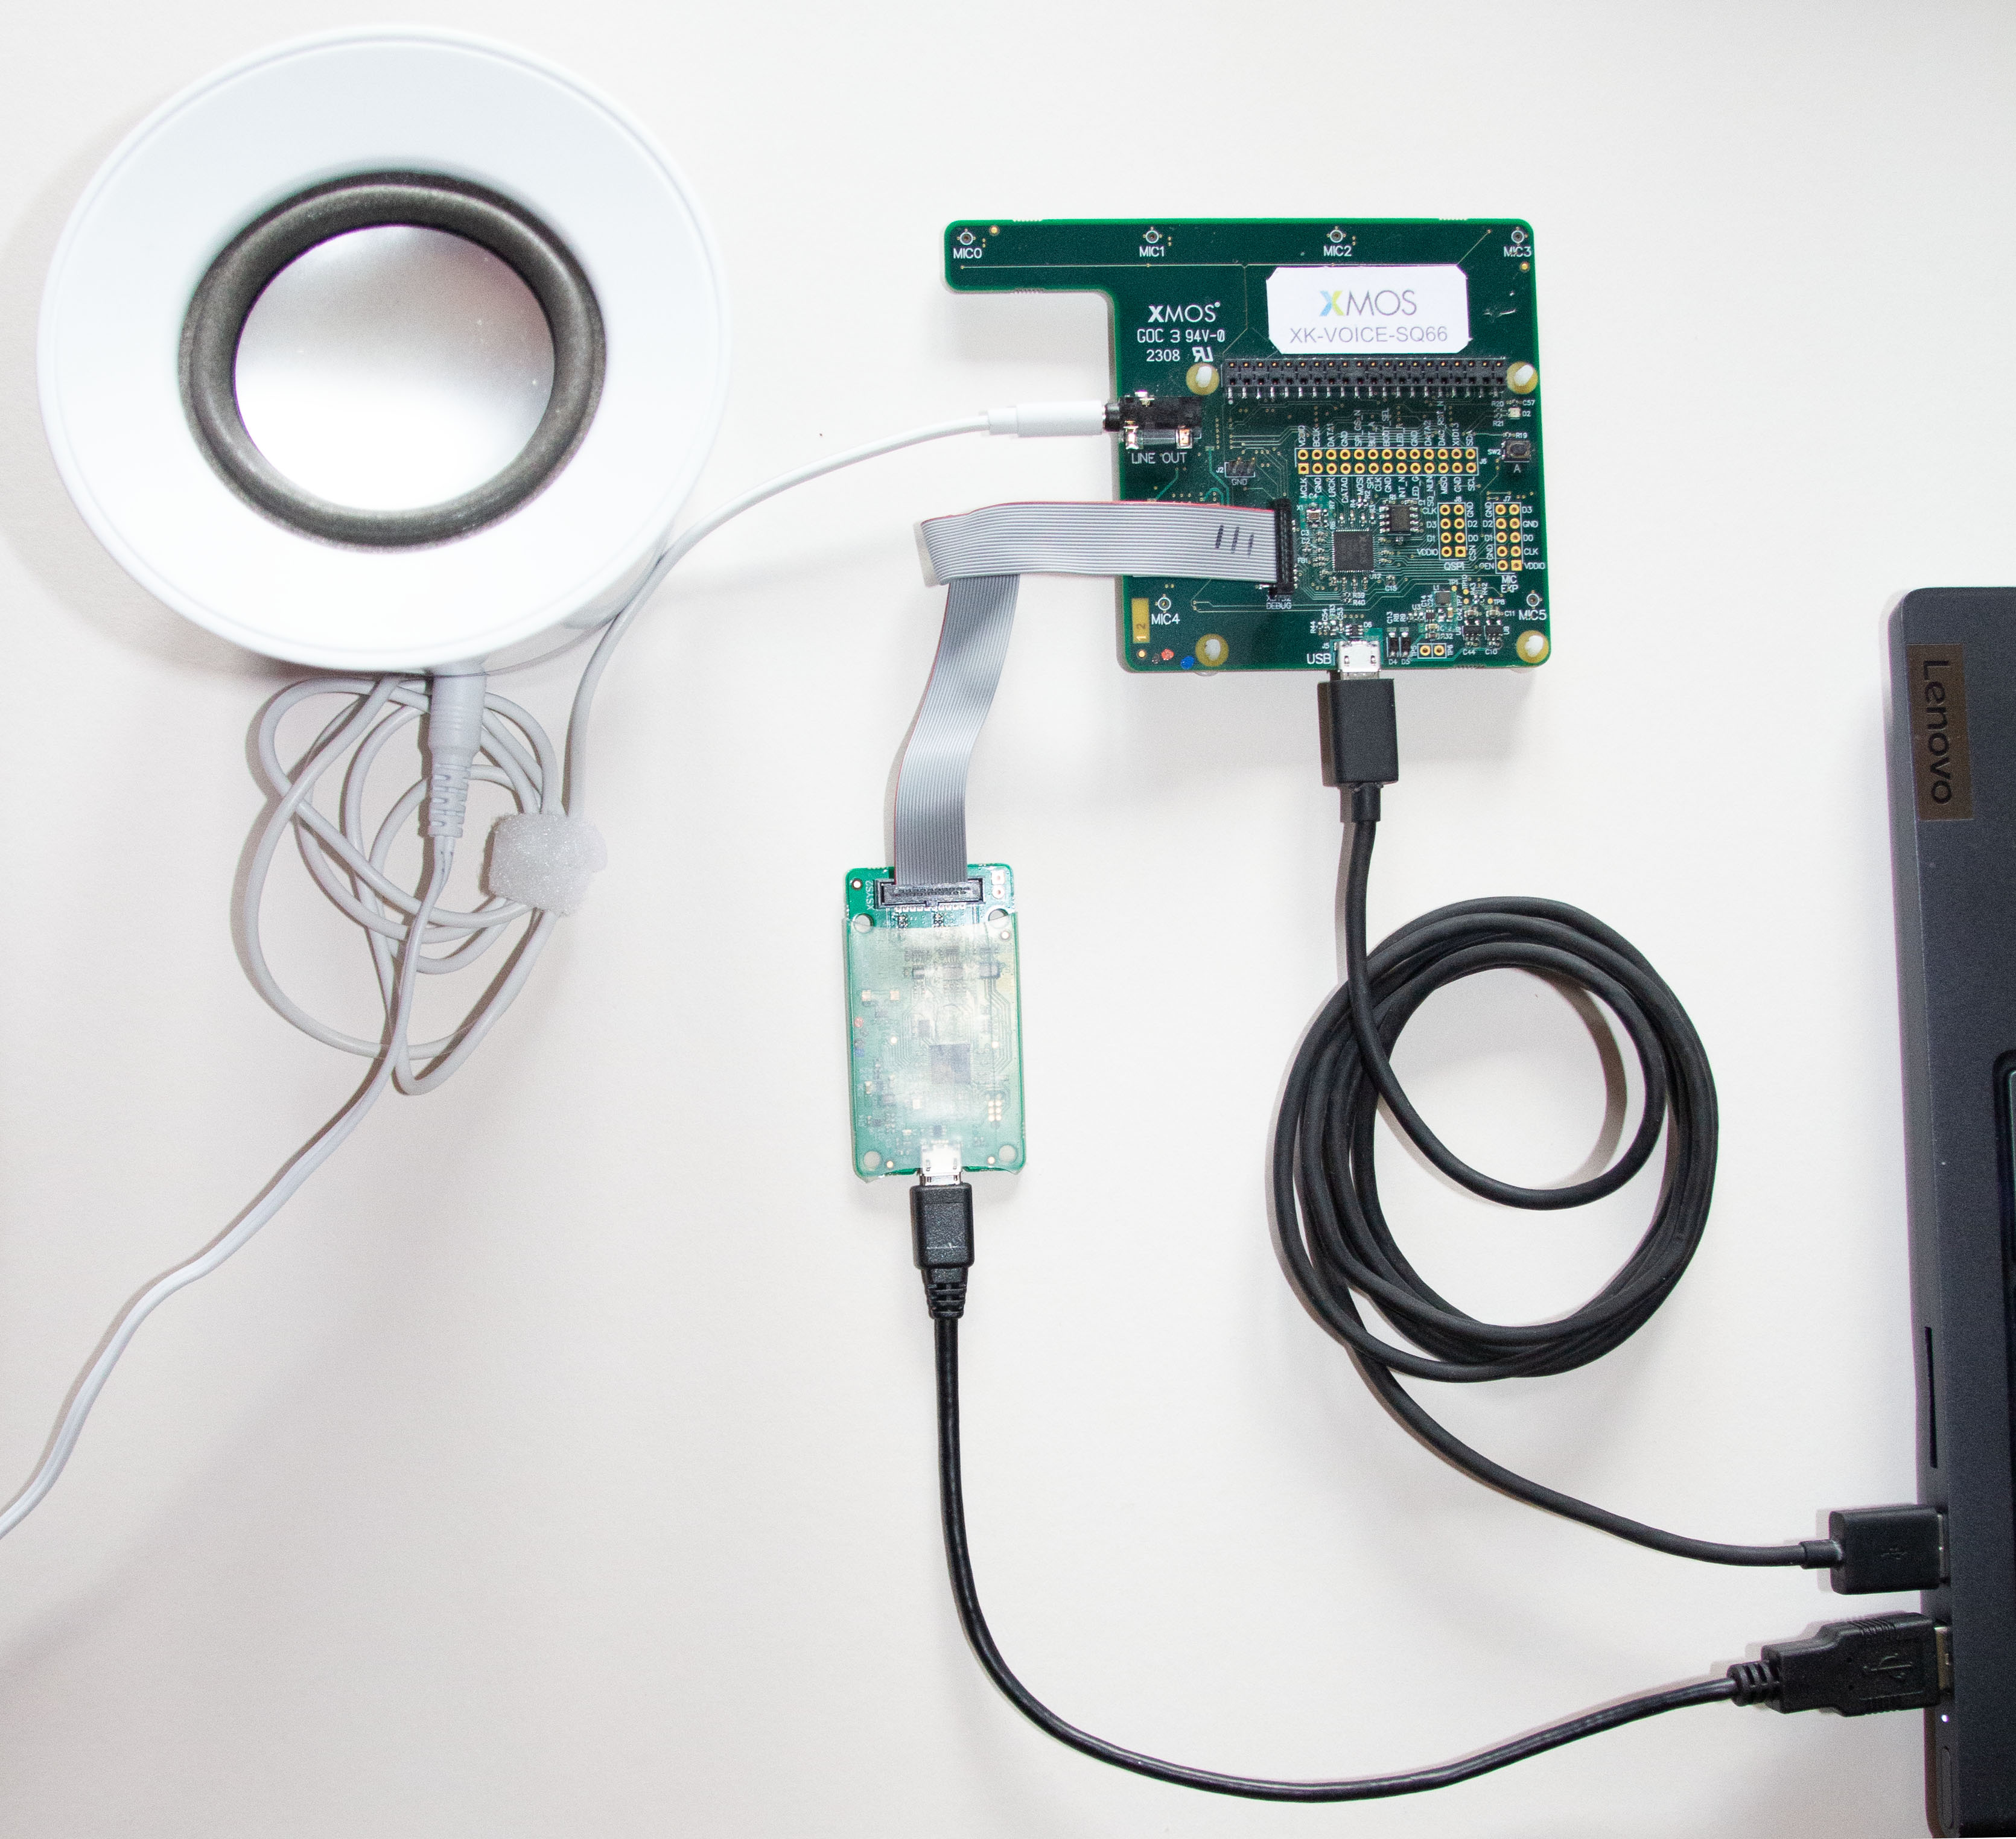
Hardware Setup - USB Accessory (UA) Configuration#
The UA configuration is the simplest configuration as the XK-VOICE-SQ66 development kit can be connected
directly to a computer using a USB port.
An XMOS XTAG4 with associated ribbon cables (Provided in the XK-VOICE-SQ66 development kit package).
A setup computer and a development computer (Windows, macOS or Linux are supported). Each
computer must have at least one USB connection. A single computer with at least two USB connections
may be used to fulfil both roles.
A micro USB cable to connect the setup computer to the XTAG4 and a second micro USB cable to connect the XK-VOICE-SQ66 development kit to the development computer.
Setting up the Evaluation System in UA Configuration#
The following steps are required to set up the XVF3800 evaluation hardware:
Connect the USB port on the XK-VOICE-SQ66 development kit to the development computer using a USB cable. (This provides power to the device.)
Connect an XTAG-4 debug adapter to the setup computer via USB, and connect it to the XK-VOICE-SQ66 development kit using the supplied ribbon cable.
The cable should be plugged into XSYS2 connector on the XK-VOICE-SQ66 development kit.
Fig. 11 shows the UA configuration of the XK-VOICE-SQ66 development kit.
Fig. 11 XK-VOICE-SQ66 development kit in UA configuration#
Open an XTC tools terminal window on the development computer. Verify that the XTAG4 has been correctly connected by running the following command in that window:
xflash-l
The output from this should be of the following form:
If the XTAG-4 is not properly connected to the development computer, then xflash will report NoAvailableDevicesFound.
If the XK-VOICE-SQ66 development kit is not properly connected to the XTAG-4, then the Devices column will read None.
For further guidance on the use of the XTC tools, see the https://www.xmos.com/view/Tools-15-Documentation.
The following instructions explain how to set up a Raspberry Pi computer with the XK-VOICE-SQ66 development kit
in order to evaluate the operation of the XVF3800 using an I2S audio interface in the INT-Device
configuration.
An XMOS XTAG4 with associated ribbon cables (Provided in the XK-VOICE-SQ66 development kit package).
A setup computer (Windows, macOS or Linux are supported). This computer must support USB connections and have the ability to write onto SD memory cards.
A USB cable to connect the setup computer to the XTAG4.
A Raspberry Pi microcomputer; either a Raspberry Pi 3 Model B or 4 Model B will work for this evaluation. See https://www.raspberrypi.com/ for more information.
A region-appropriate USB power supply is also required. The XK-VOICE-SQ66 development kit obtains its power supply from the Raspberry Pi.
An SD memory card - minimum 8GB size
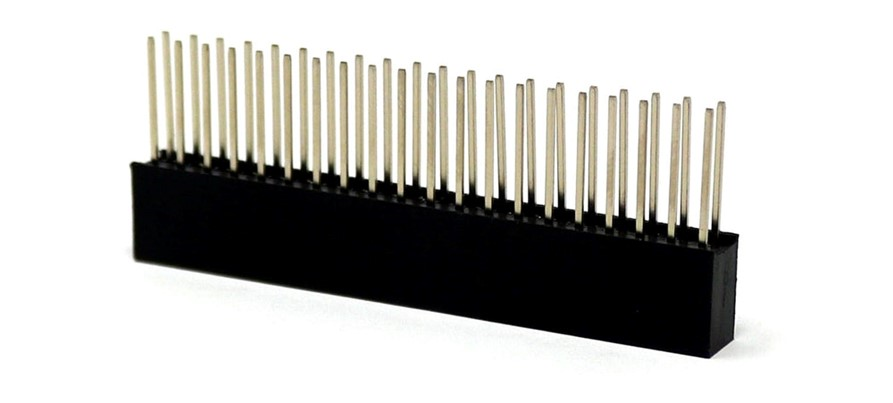
A stacking header block, as pictured in Fig. 12 to mount the XK-VOICE-SQ66 development kit board onto the Raspberry Pi using the standard 40 pin GPIO header. For your convenience a suitable header block is included in the XK-VOICE-SQ66 development kit package.
Fig. 12 Raspberry Pi HAT Connector - 10 mm Extended Tail Socket#
The XVF3800 evaluation firmware binary release package (available from the XVF3800 developer page).
Instructions and a script for setting up the Raspberry Pi are provided at https://github.com/xmos/vocalfusion-rpi-setup. Follow these instructions to generate the OS image and configure the Raspberry Pi.
When running the setup script on the Raspberry Pi, the following commands should be used to setup the Raspberry Pi for use with the XK-VOICE-SQ66 development kit:
To enable a remote GUI access on the Raspberry Pi, the VNC service should be enabled at this point with the following command.
sudoraspi-config
Select 3InterfacesOptions and enable VNC and SSH (if not already set using the imager) on the next screen.
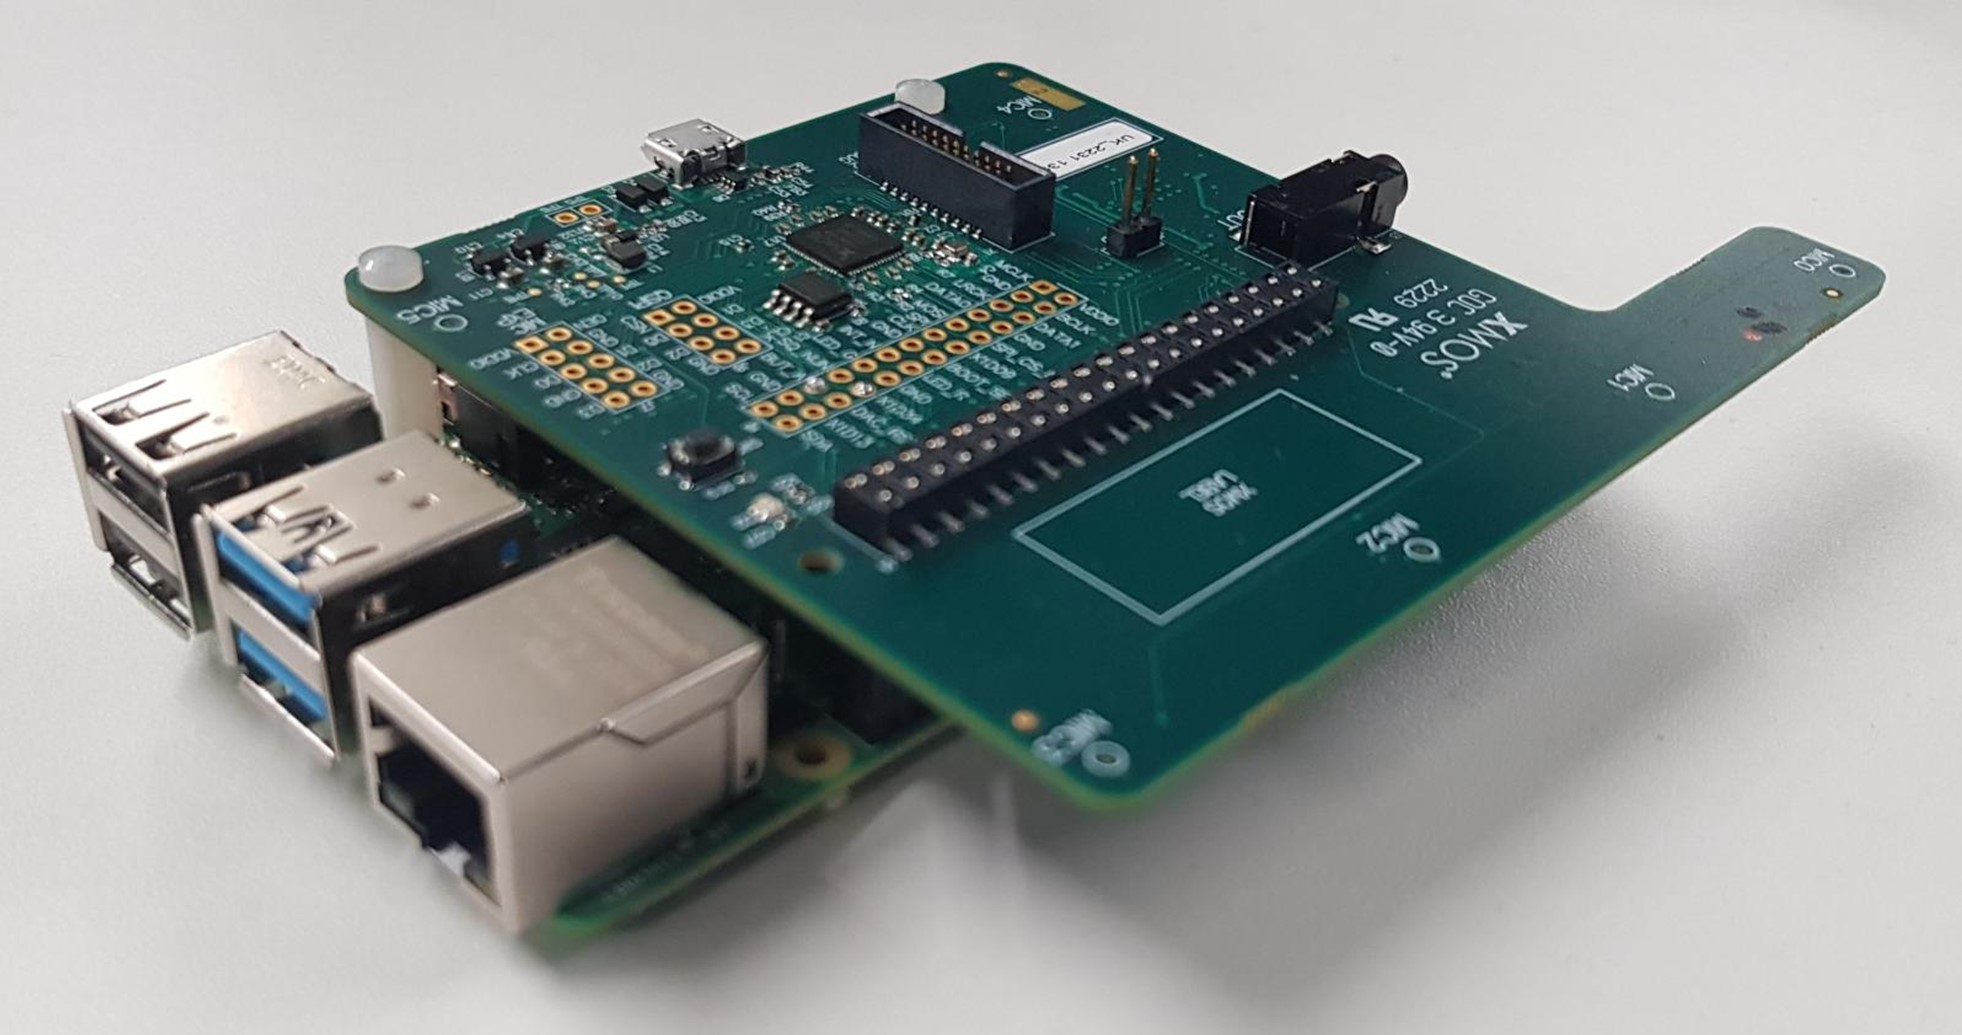
Shutdown the Pi, detach the power and mount
the XK-VOICE-SQ66 development kit board onto the Raspberry Pi header. After mounting the board, reattach power and verify the Raspberry Pi restarts.
The evaluation hardware should be placed on a piece of foam.
This is to prevent the loudspeaker causing the board to vibrate and buzz on the table, causing the acoustic coupling between them to vary.
In a final product, the loudspeaker and microphone will be build into to the same housing, and so the coupling cannot vary.
The evaluation hardware is now ready to use, and should resemble Fig. 13.
to choose between a 16 kHz or 48 kHz I2S LR clock (and therefore reference input and processed output audio sample rate). This setting is only used in INT configurations
Microphone topology
-sqr / -lin
to choose between a “squarecular” or linear microphone array
Control protocol
-i2c / -spi
to choose between I2C and SPI control modes. This setting is only used in INT configurations, the UA configurations always use USB control mode
Audio MCLK
-extmclk
to choose between external or internal MCLK. This setting is only used in INT configurations
Audio output
-spatial
to choose between a stereo output from the device giving audible indication of the location of the speaker, or the default output
Note
Some binaries are provided which have the suffix -extmclk. These are intended for use in systems where an external
MCLK is provided, and they disable the XVF3800’s clock recovery system. These builds are not for use with a Raspberry Pi.
The firmware is installed using the XMOS XTAG4 adapter supplied with the XK-VOICE-SQ66 development kit.
Connect an XTAG-4 debug adapter to the setup computer via USB, and connect it to the XK-VOICE-SQ66 development kit
using the supplied ribbon cable. The cable should be plugged into XSYS2 connector on the XK-VOICE-SQ66 development kit.
Open an XTC tools terminal window on the computer. Verify that the XTAG4 has been correctly connected by running the following command in that window:
xflash-l
The output from this should be of the following form:
If the XTAG-4 is not properly connected to the development computer, then xflash will report NoAvailableDevicesFound.
If the XK-VOICE-SQ66 development kit is not properly connected to the XTAG-4, then the Devices column will read None.
For further guidance on the use of the XTC tools, see the https://www.xmos.com/view/Tools-15-Documentation.
Select the required binary firmware image from the release package, and transfer it to the XK-VOICE-SQ66 development kit using the xflash tool.
xflashapplication_xvf3800_intdev[...].xe
The XTAG4 adapter can be disconnected from the XK-VOICE-SQ66 development kit after successfully installing the firmware image if desired.
After completing the setup, follow the instructions below to set up the audio path.
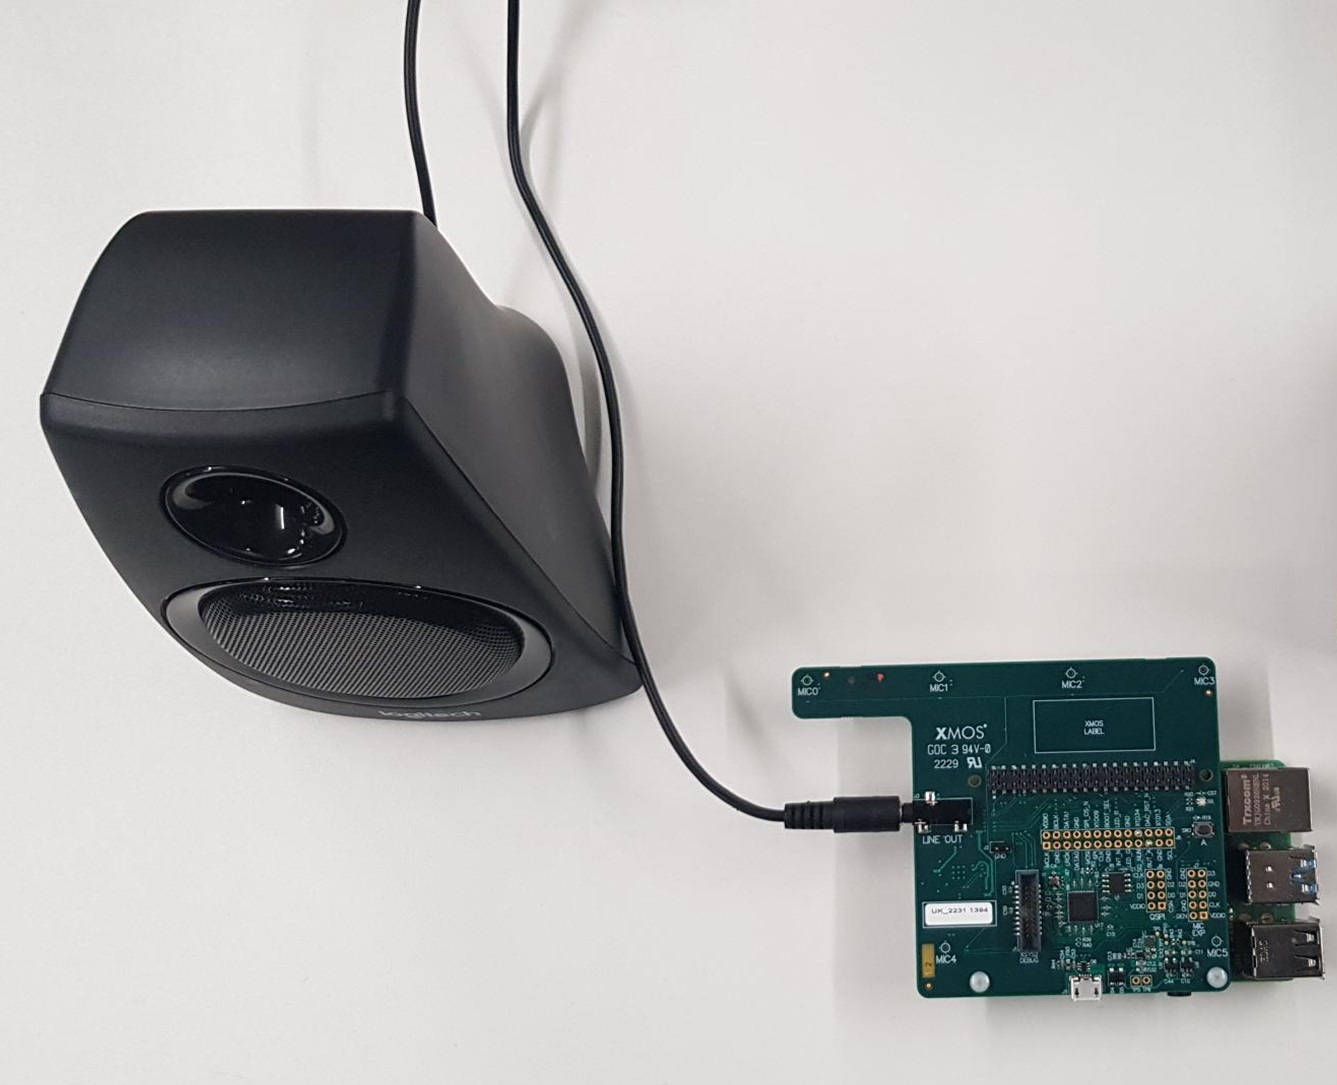
To play reference audio into the room, a high quality loudspeaker operating in its linear region is required.
Connect the loudspeaker to the LINE OUT port on the XK-VOICE-SQ66 development kit, which accepts a 3.5 mm TRS jack plug connector.
The left channel of the LINE OUT port must be used for the speaker signal.
It is important for the ideal demonstration that the position, orientation, and volume of the loudspeaker are
representative of a real-world system.
To achieve optimal performance:
Align the front of the loudspeaker with the microphone strip at the top of the XK-VOICE-SQ66 development kit and
Place the loudspeaker 2-4 cm away from the device
An example layout can be seen pictured in Fig. 14.
The XVF3800 implements a mono audio processing pipeline so a mono speaker system should be used for optimum performance. By default the system uses the left channel (channel 0 on I2S) as the AEC reference signal. If stereo speakers are used, both speakers will play the left channel.
and stored on the computer used for playback (USB host or I2S host). If the Raspberry Pi is connected to the internet
the files can be copied with the following:
The output volume must be changed directly on the loudspeaker or on a connected amplifier, not on the computer.
In this example, the volume of the track measured at a 1 metre distance from the loudspeaker should be 73 dBA ± 2 dBA on average, but for tuning the device against a specific set of requirements ensure that the relevant output level has been achieved for the targetted specification.
Ensure that the reference signal is not digitally clipped as it is sent to the device; this can lead to non-obvious issues in device performance.
Playback and recording through the XVF3800’s I2S interface, once the Raspberry Pi has been set up correctly,
can be achieved through standard use of the ALSA card snd_rpi_simple_card,device0. For example, from the command line,
a 2 channel 32-bit 48 kHz WAV file may be played as reference audio through aplay with the following command:
Alternatively, in a desktop environment on the Raspberry Pi, Audacity ™ may be used to visually play and record.
The sample rate must be set to match the XVF3800 in the Project Rate (Hz) selection in the bottom left, or in the Edit -> Preferences -> Audio Settings menu.
The sound card settings must match the ones highlighted in Fig. 15:
In the UA configuration, Audacity ™ may be used to visually play and record signals from the device.
The sample rate must be set to match the XVF3800 in the Project Rate (Hz) selection in the bottom left, or in the Edit -> Preferences -> Audio Settings menu.
The device should appear as a USB sound card with the default name of XMOS XVF3800 VoiceProcessor.
On Audacity both playback and recording devices should be set to be the XVF3800.
With the standard evaluation firmware the USB parameters are:
In the default configuration the USB Audio bit-depth is set at 16bit.
The XVF3800 also supports a bit depth of 24bit or 32bit over USB.
This can be changed using the control command USB_BIT_DEPTH or modifying the usb default parameters
(see sources/app_xvf3800/cmd_map_gen/yaml_files/defaults/usb_param_values.yaml in the release package).
If audio is being played by the host but not heard from the loudspeaker, it is likely that there exists a connection issue
between the host and the XK-VOICE-SQ66 development kit board. Ensure that the XK-VOICE-SQ66 development kit board is powered, and the loudspeaker connected and powered. The
right channel of the far end is not played out of the DAC so ensure your audio source contains a signal in the left channel.
If audio is heard from the loudspeaker but no input audio is received by the host, ensure that the host is configured
to transmit and receive audio at the correct sample rate (either 16 kHz or 48 kHz, depending on the chosen firmware).
On Windows, the USB audio drivers are cached, and this can cause issues when switching between 16 and 48 kHz sample rates. In this case,
it is recommended to clear the cached audio drivers using the third-party tool USBDeview. The executable can be downloaded from https://www.nirsoft.net/utils/usb_devices_view.html,
and the cached drivers can be removed by using the USBDeview GUI, or by typing from a command line with Administrator rights:
USBDeview.exe/RunAsAdmin/remove_by_pid20b1;4f00
If there is still no input from the device, it is possible that the device firmware has stalled; disconnect and reconnect power
to the XK-VOICE-SQ66 development kit to reset the device, and then attempt input again.
Low volume of recorded audio during audio playback#
When playing audio through the loudspeaker, it is important that in the test track chosen, near-end speech doesn’t overlap extensively with the far-end audio. If this happens, the near-end audio will be
suppressed; this is a common feature of a conference audio device. In the Loudspeaker section some audio tracks are recommended for testing.
These tracks contain audio interspersed with silence, so that the near-end speaker can talk while the far-end audio is silent.
If the instructions above are followed, the Automatic Gain Control (AGC) of the device will lower and increase the near-end speech accordingly.
If the volume of the recorded near-end audio is still too low, please follow the steps in the AGC Configuration section to properly tune the AGC.
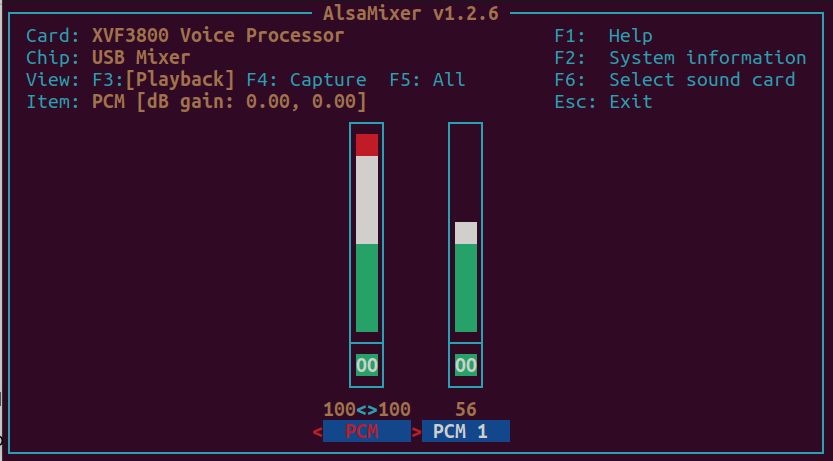
Low volume of playback audio on Linux for XVF3800-UA#
If the volume of the ludspeaker output of the XVF3800-UA on Linux is too low, it is possible that the alsamixer levels of the XVF3800 soundcard must be updated.
To do this, follow the steps below:
Open a terminal and type alsamixer.
Press F6 to open the soundcard menu.
Use the up-down arrows to select the XVF3800 sound card and press Enter
In the menu below, the PCM-1 volume could be 40 (-20 dB) instead of 100,
use the keyboard arrows to select PCM-1 volume and increase it up to 100%.
Press ESC to exit alsamixer.
Before unplugging the XVF3800-UA, run the command:
sudoalsactlstore
to store the setting permanently; otherwise the steps above must be repeated every time the XVF3800-UA is re-connected.
The AEC requires a reference signal be present in order to converge on a room transfer function estimate - this process will take a few seconds after reference audio has begun being provided.
If the AEC has not been allowed to converge, the XVF3800 will tend to over-suppress
near-end speech in its output to avoid undesirable artefacts being relayed to the far-end.
This effect does subside within the first few seconds of use, so if the device is unexpectedly restarted
then performance will be reduced momentarily but should restore over time.
If the device has consistently poor acoustic performance, it is likely that the AEC has not converged appropriately;
restart the device and repeat the AEC convergence procedure described in the later sections to reset the AEC to a new set of coefficients.
If this does not resolve the issues, it is permissible to lower the loudspeaker volume. If loudspeaker volume is adjusted, or if there is any other change in environment,
ensure that the AEC has reconverged before proceeding by playing several seconds of far-end audio again.
The AEC will constantly reconverge, so a small change in environment such as a window opening or a change in loudspeaker volume
should be automatically adjusted for by the AEC; however, actions that alter the direct delay path significantly,
such as moving the loudspeaker, will require the device be reset and the AEC be allowed a few seconds to reconverge from startup.